This guide explains everything in simple words, step by step, so even someone who has never used
Raspberry Pi before can follow it confidently.
If you follow this guide carefully, your Raspberry Pi will boot successfully on the first try.
- What Is a Raspberry Pi?
A Raspberry Pi is a small single-board computer. It does not have a built‑in hard disk like a laptop or PC.
Instead, it uses a microSD card as its main storage.
This SD card stores: – The operating system – System files – Your programs – Your data
Without an SD card, Raspberry Pi cannot start. - What Does “Bootable SD Card” Mean?
A bootable SD card means: – It contains an operating system – The Raspberry Pi can read it – The Pi can
start (boot) from it
When power is supplied: 1. Raspberry Pi checks the SD card 2. Finds the boot files 3. Loads the
operating system 4. Shows the desktop or terminal
If the SD card is not bootable, you may see: – Red LED only – No display – Black screen
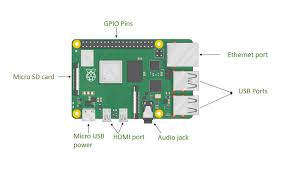
1 - Things You Must Have (Very Important)
Hardware Requirements
You must have these items:
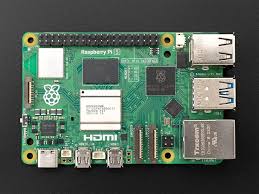
Raspberry Pi Board (any model)
Pi 3 / Pi 4 / Pi 5
Pi Zero / Zero 2 W
MicroSD Card
Minimum: 16 GB
Recommended: 32 GB or more
Power Supply
Use official or good quality adapter
Low power causes boot failure
SD Card Reader
USB card reader or laptop slot
Display & Cable (optional but helpful)
HDMI cable
Monitor or TV - Choosing the Right SD Card (Do Not Ignore This)
Bad SD cards cause 90% of Raspberry Pi boot problems.
Recommended Specifications
Speed: Class 10 / UHS‑1
Brand: SanDisk, Samsung, Kingston
Avoid unknown or fake cards
Tip: If Raspberry Pi boots slowly or crashes, change the SD card first. - Operating System for Raspberry Pi
An operating system (OS) is required to control hardware and software.
Best OS for Beginners
Raspberry Pi OS (Official) – Stable – Easy to use – Full desktop support
Available versions: – 32‑bit → Older models – 64‑bit → Newer models (Pi 4, Pi 5)
Always choose Raspberry Pi OS with Desktop if you are new. - Download Raspberry Pi Imager (Official Tool)
Raspberry Pi Imager is the easiest and safest way to make a bootable SD card.
It: – Downloads the OS automatically – Writes it correctly – Verifies files – Reduces errors
Install it on: – Windows – macOS – Linux - Insert SD Card into Computer
Insert microSD card into card reader
Connect card reader to computer
Ensure the card is detected
Backup data if needed
Warning: SD card will be fully erased. - Open Raspberry Pi Imager (Understanding the Screen)
When you open the software, you will see three buttons:
Choose Device → Select Raspberry Pi model
Choose OS → Select operating system
Choose Storage → Select SD card
These steps prevent mistakes. - Select Raspberry Pi Model
Click Choose Device and select your model.
Why this matters: – Correct boot files – Correct kernel – Best compatibility
Example: – Raspberry Pi 4 – Raspberry Pi Zero 2 W - Select Operating System (Detailed Explanation)
Click Choose OS.
Recommended options:
Raspberry Pi OS (64‑bit) → Best performance
Raspberry Pi OS (32‑bit) → Stable, older models
Other OS options (advanced users): – Ubuntu – LibreELEC – RetroPie
Beginner rule: Stick to Raspberry Pi OS. - Select Storage Carefully
Click Choose Storage and select your SD card.
IMPORTANT: – Selecting the wrong drive can erase your hard disk – Always double‑check size and
name - Advanced Settings (EXTREMELY IMPORTANT)
Press: – CTRL + SHIFT + X (Windows/Linux) – CMD + SHIFT + X (macOS)
Configure Before Writing
You can set:
Username & password
Enable SSH (remote access)
Configure Wi‑Fi
Time zone
Keyboard layout
Hostname
This saves a lot of time later. - Writing the OS to SD Card
Click Write
Confirm erase warning
Wait patiently (5–10 minutes)
Verification will run automatically
Do not remove the SD card during writing. - Safely Remove SD Card
After completion: – Click eject – Remove SD card safely
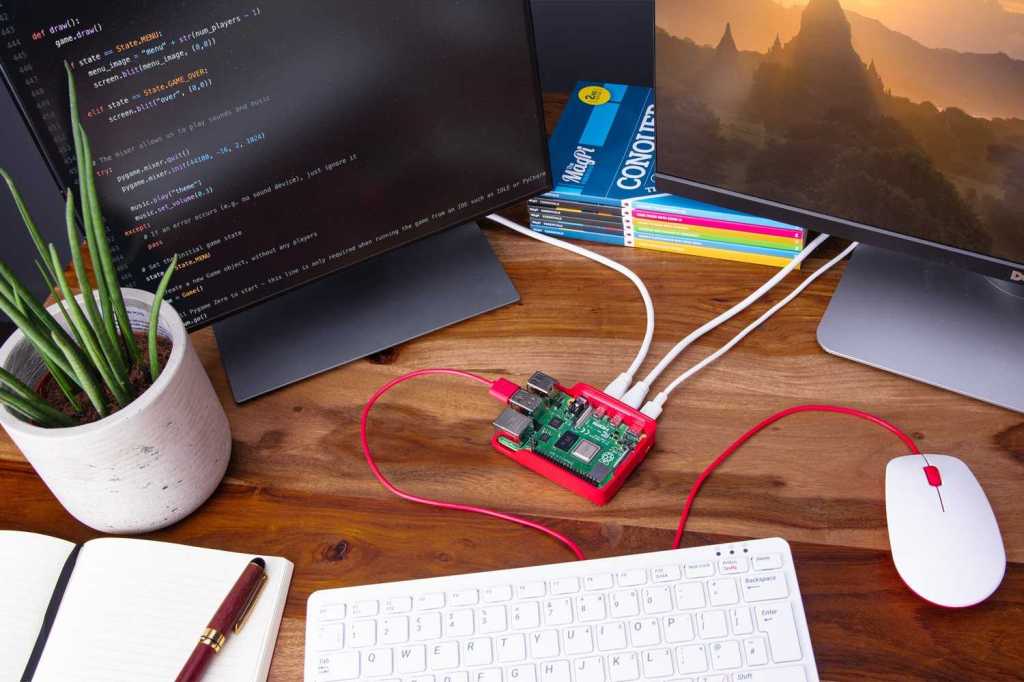
Removing it unsafely can corrupt files. - Booting the Raspberry Pi (First Time)
Insert SD card into Raspberry Pi
Connect HDMI
Connect keyboard & mouse
Plug power supply
The Raspberry Pi will: – Show boot screen – Load OS – Display desktop or terminal
Congratulations! Your Pi is running. - First Boot Setup Explained
On first boot: – Language selection – Country & Wi‑Fi – Password confirmation – Software update
Let updates finish for best stability. - Common Problems & Easy Fixes
Problem: No Display
Try HDMI port 0
Check power adapter
Re‑flash SD card
Problem: Red Light Only
Bad SD card
OS not written properly
Problem: Slow Boot
Low‑quality SD card
Use faster card - Best Practices (Very Useful Tips)
Always shut down properly
Keep backups
Use official power supply
Keep OS updated - Frequently Asked Questions (FAQ – SEO Boost)
Q1. How do I make a bootable SD card for Raspberry Pi?
You can make a bootable SD card for Raspberry Pi by using Raspberry Pi Imager, selecting your Pi
model, choosing Raspberry Pi OS, and writing it to a microSD card.
Q2. Which SD card is best for Raspberry Pi?
A Class 10 or UHS‑1 microSD card from brands like SanDisk or Samsung (32GB or higher) is best for
Raspberry Pi.
Q3. Why is my Raspberry Pi not booting from SD card?
Common reasons include a corrupted SD card, low‑quality power supply, wrong OS image, or improper
flashing.
Q4. Can I install Raspberry Pi OS without a monitor?
Yes. Enable SSH and Wi‑Fi using advanced settings in Raspberry Pi Imager for headless setup.
Q5. Is Raspberry Pi OS free?
Yes, Raspberry Pi OS is completely free and officially supported. - Final Words (Conclusion – SEO Friendly)
Making a bootable SD card for Raspberry Pi is the first and most important step to start your
Raspberry Pi journey. By using the official Raspberry Pi Imager, selecting the correct OS, and using a
good‑quality SD card, you can avoid most boot problems.
This step‑by‑step Raspberry Pi bootable SD card guide is designed for beginners, students, and
hobbyists who want a clear and reliable method.
Once your Raspberry Pi is running, you can explore programming, Linux learning, home automation,
servers, robotics, and IoT projects.
With the right setup, Raspberry Pi becomes a powerful learning and development tool.
SEO Tip: Keep this article updated, add images with alt text like “Raspberry Pi bootable SD card setup”,
and interlink related Raspberry Pi tutorials for higher Google ranking.
Making a bootable SD card for Raspberry Pi is easy when done correctly.
Once your Raspberry Pi is ready, you can use it for: – Programming – Home automation – Servers –
Learning Linux – Robotics & IoT